
Hello and welcome to next blog post on NPrinting adventures. Today we are looking at the topic which comes and goes on Qlik Community quite frequently and frankly does deserve little bit more attention. That topic is: How to send a NPrinting report to Microsoft Teams or how to send NPrinting report to Microsoft SharePoint. Both options are possible, but both have some limitations which I will describe later. Let’s have a look at them separately as they need different approach.
Teams
Sending report to Microsoft Teams is possible out of the box with NPrinting. Each Team created in Teams can have various channels with dedicated email addresses associated with each of them. It means that we can send email directly to this email address hence send report via email directly to particular Team channel. All what we need to do is:
- obtain email address as shown on image below
- create NPrinting user using that email address and set it up as recipient of publish task

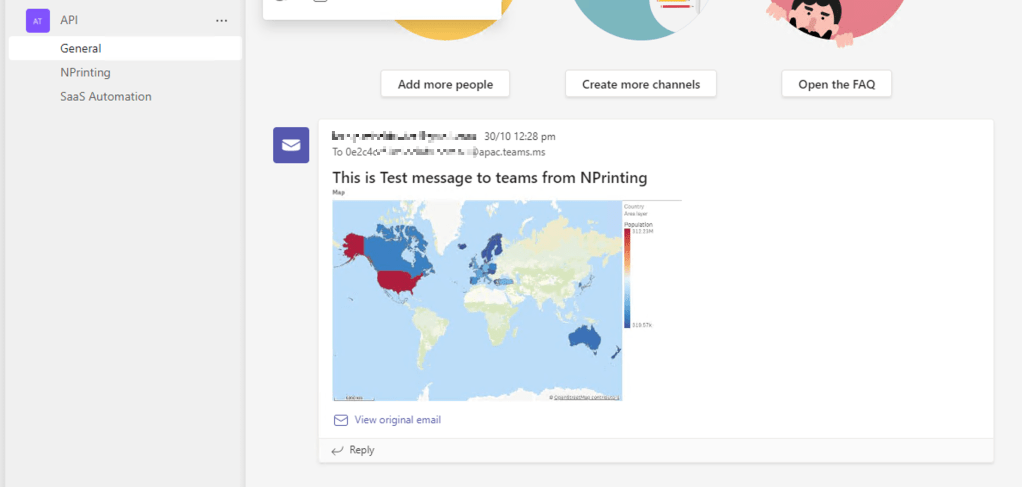
This opens up opportunity to utilize NPrinting HTML embedded reports which can appear in Team channel with whole HTML content as shown below. Reports sent as attachments are also supported.
Limitations: we can only send email messages to Teams channels meaning there is no way to send message to Chat (individual person).
SharePoint
Sending reports to Microsoft SharePoint is little bit more tricky. We have no out of the box solution for it as support for email destination was deprecated some time ago as mentioned below.
Note: Incoming email is available only in SharePoint Server 2016 and earlier versions of SharePoint Server, and has been deprecated as of SharePoint Server 2019. For more information about the deprecation, and alternate suggestions for functionality, see What’s deprecated or removed from SharePoint Server 2019.
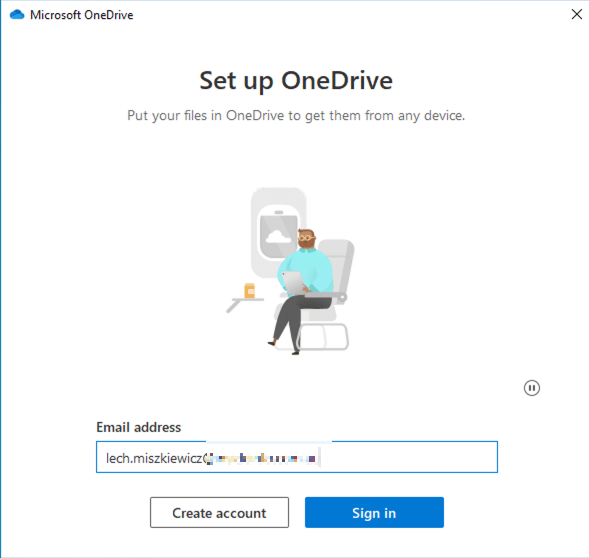
There is workaround which you can use to have acceptable solution and OneDrive comes here to rescue. First you must install your OneDrive app/plugin. When installation is done you start OneDrive configuration and here are some simple steps:
- Login to OneDrive with your account
- Configure folder on local drive which will be used as a drop point of all reports which will be synced to SharePoint. Make sure you consider disk space required and plan as this can get little bit messy if you need to change it in the future

- I also recommend disabling backup of any personal folders as the purpose of that OneDrive is purely use as a sync tool with SharePoint

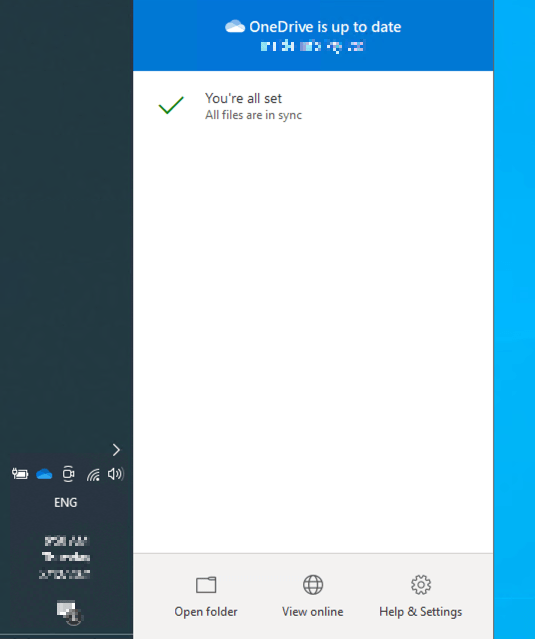
- Once everything is done you should see this
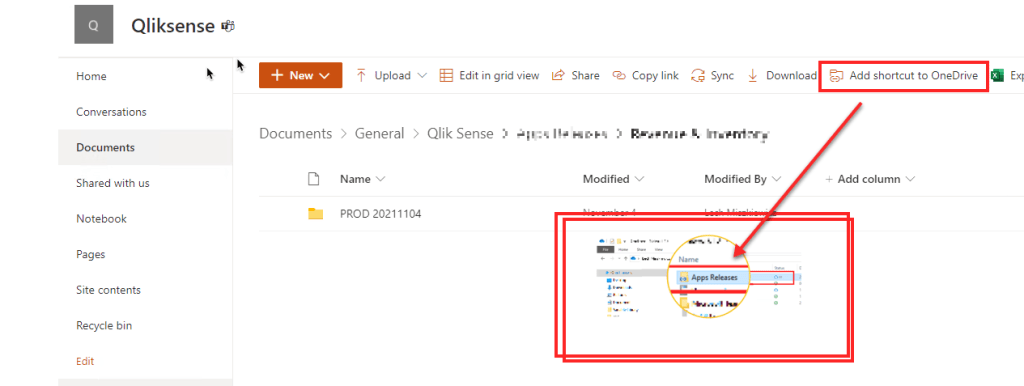
- Next step in synchronization with SharePoint. This is again very easy. You can go to SharePoint and use option: “Add shortcut to OneDrive”, which will create subfolder in previously configured OneDrive folder on your local drive
- Next step is a setup of NPrinting folder destination which will point to subfolder created in previous step. You must ensure that user account running NPrinting Engine service has rights to write/overwrite files in it.

- Last step is to use folder destination in your publish task. NPrinting will produce reports and store them to the local drive. OneDrive app will sync those files to the SharePoint.

The above solution is just a workaround. It uses 3rd party tools and therefore I consider this as semi reliable solution. Having many moving parts like dependencies on successful login to your OneDrive account, having OneDrive app running all the time, ensuring that sync process is working correctly are the few disadvantages which should be considered. Regardless of that it is still worth exploring as for now that is the only working option I was able to find.
cheers
Lech


Amazing work Lech! This will help me a lot!
Thanks
LikeLike